Projects
DIY LED Lighting
Materials:
-
•40 - Cree XR-E Q5 Cool White LEDs ($234)
-
•40 - Cree XR-E Q5 Royal Blue LEDs ($234)
-
•80 - 40 Degree Optics ($72)
-
•2 - 8.46” x 22” Heatsink ($99)
-
•3 - 36V, 150W Power Supply ($55)
-
•10 - Recom RCD-24 LED Drivers ($180)
-
•4 - Custom PCBs ($39)
-
•Arduino Pro uController ($20)
-
•Misc Parts (Wire, MDF, Resistors, etc) ($40)
Total Project Cost: $973
Project Details:
This is the project that I get the most questions about. I designed everything from the LED layout, optic selection, LED drive circuitry and microprocessor controller. I’m going to post all of the details about my designs and where I got the parts from.
It’s going to take some time before I can actually put all of the details up, but feel free to email me if you need help with your design. (engineer AT engineersreef DOT com)
Background
When I started building my 90g Reef, I got a custom made dual 250W metal halide and T8 hood. Since the MH lamps need to be changed out fairly frequently not to mention the crazy amount of heat that they put off. At the time, one of the people in my old reef club (Nano-Reef) had built a pretty simple LED lighting fixture for his nano. I did some research, looked into the cost savings and determined that LED was the way to go.
Parts Selection
LEDs: The best of the best in high-power LEDs at the time was Cree’s 3W XR-E Q5 series. There were only a handful of colors available so I went with the obvious selection of “Cool White” and “Royal Blue.” Other colors were green and reds, definitely not going to work for a tank light. I bought the LEDs from an importer that was recommended to me, ETG Technologies. The LEDs were only $5.85 each mounted to a star PCB.
Optics: With this many LEDs there’s no way that I was going to not use optics. Many people skip this step, but you lose far too much light. I chose to go with 40 degree optics. They allow me to simulate running a 250W MH lamp. At a whopping, $0.90 each, how could you go wrong? I bought them along with the LEDs from ETG Tech. They are absolutely a cinch to mount, just align them with the LED on the star PCB and then push it on. No tools, no glue, nothing.
Constant Current Drivers: Most people then (and many now) use the Buck Puck LED drivers for their DIY setups. The Buck Pucks can only handle (as of 2008) up to 6 LEDs each and with 80 LEDs, controlling, powering and wiring 14 of them is not high on my list. Recom offers a PCB mounted driver that is capable of driving 12 LEDs each, the RCD-24. The price of them was about on par with the BuckPucks so the choice was easy. I found them for a fair price, $18 each, from an online vendor Cypower. To be honest with you, it was not a pleasant purchasing experience, you’d be better off finding another source. The drivers are nice and compact. Only downside to them is that they make a high-pitched whine if you run them less than full power. I don’t notice the sound anymore, but you could find something quieter.
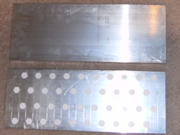
Heatsinks: An absolute must when you are running LEDs. They get extremely hot and their life gets drastically reduced when they are run hot. For the most part, you should be able to get away without using fans if you have a sufficiently sized heatsink. I chose a 3” x 8.46” x 22” extruded aluminum heatsink from HeatsinksUSA. They have a great array of different sizes and profiles available and they ship very quickly. For $99, I got two heatsinks cut to the dimensions I wanted. Shipping was fast and very reasonable ($11) considering the fact that these things weigh about 15lbs each.
Arduino Microcontroller: (UPDATED!! I switched over to using a Reef Angel to control this setup from my original Arduino. The Reef Angel uses an Arduino internally, but has several electrical ports for other control applications too.) For a simple project like this it didn’t make sense for me to go overboard and design a microcontroller setup from scratch. A really nice option that has gained in popularity is the Arduino. It is based on the tried and true AVR, but it has a very simple programming interface. It provides convenient PWM outputs and digital/analog inputs that can be controlled with a single line. I bought mine from a great resource for all Do-It-Yourselfers, SparkFun Electronics. They have lots of parts, coding examples and a very friendly and responsive customer service group.
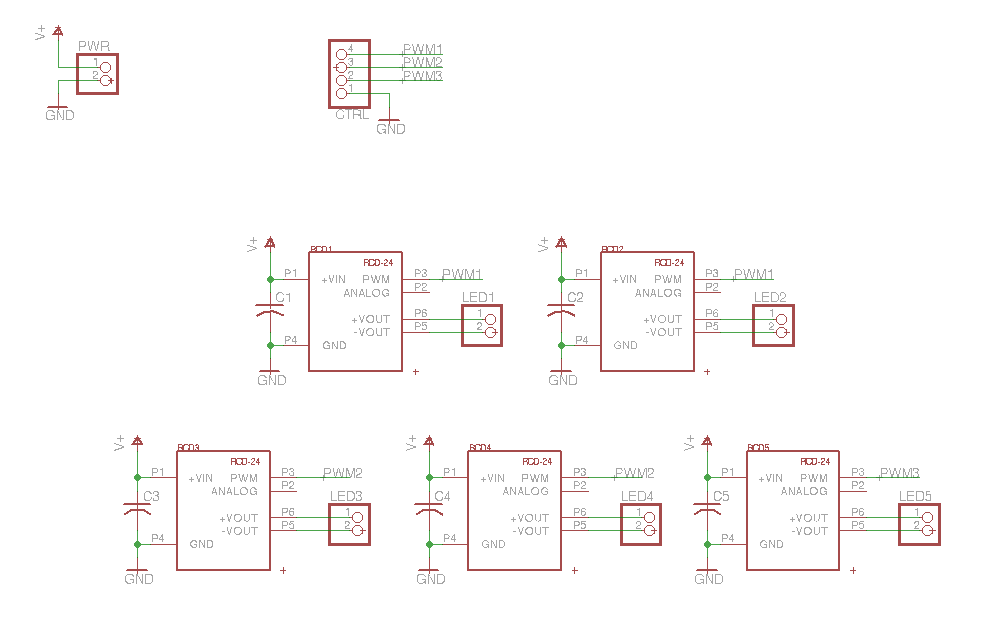
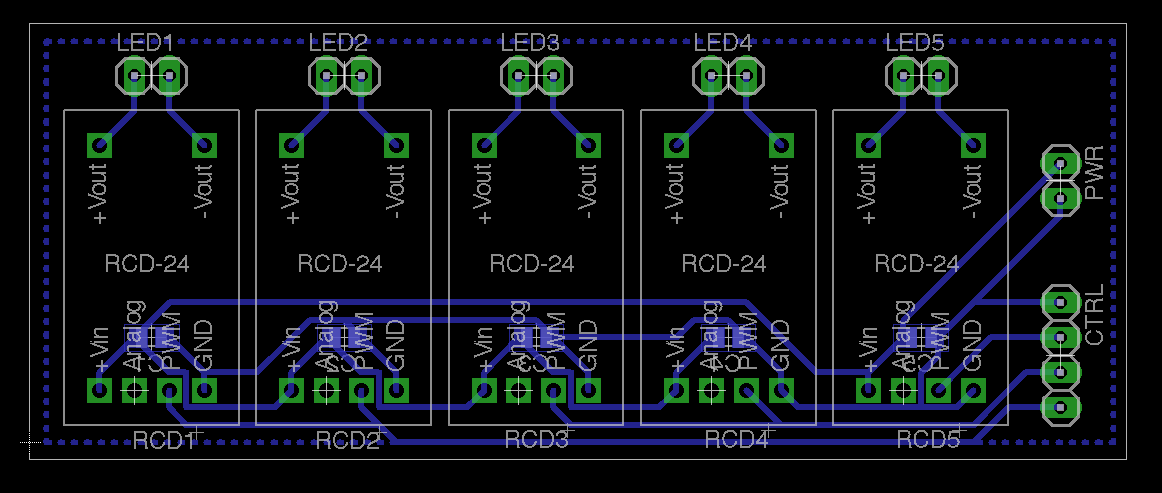
Custom PCB Design
I designed a very simple board that incorporates 5 Recom RCD-24 LED drivers into a small package. I designed these using EaglePCB a free design tool. I’d be happy to provide you with the the actual Eagle files if you’d like to try these boards out.
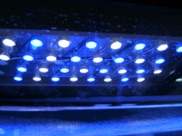
Result
I have to say that I am extremely happy with how this whole setup came out. The LEDs throw off A LOT of light...